Easily list your scientific equipment

Top suppliers for laboratory & industry

New and used instruments

Marketplace
Analytics
Brand
Radwag
Model
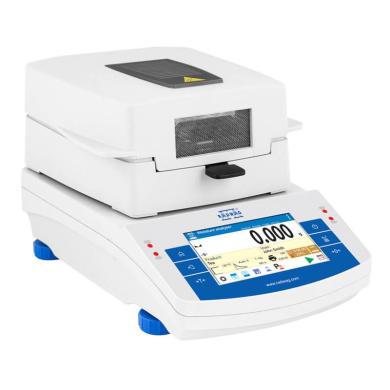
MA 210.X2.A Moisture Analyzer
Supplier
Radwag
Location
Radom - Poland
Price
€1,836.00 
(ex. VAT)
This item is
for sale
State of item
new
Categories

Radwag MA 210.X2.A Moisture Analyzer

Radwag€1,836.00 (ex VAT)
item image

Description by the supplier

MA X2.A moisture analyzers are hi-tech measuring instruments intended for quick determination of relative moisture content,

dry mass content and other parameters in samples of different substances.


MA.X2.A series


is

equipped with innovative system: the drying chamber can be opened and closed automatically using button or proximity sensors.


Such solution allows:


Maintaining moisture analyzer clean – operator does not touch moisture analyzer’s housing.


Removing any shocks caused by manual closing of the chamber – the chamber closes automatically and always with the same intensity.


Achieving high repeatability of opening and closing the drying chamber.


Enhancing drying process automation.


Enhancing safety of operation by eliminating contact with hot components of drying chamber.


Improving operation ergonomics.


MA.X2.A

series features user-friendly colour touchscreen. Free configuration of the control panel can be done by means of hotkeys, customizable information fields and programmable labels. Drying process can be carried out for any temperature and – thanks to databases – particular drying process may be set for a specific product.


Highlights of X2 Series moisture analyzers:


Automatic opening and closing of the drying chamber


5” capacitive colour touchpad


Modern interface


Uncomplicated, intuitive operation


Programmable display


Drying profiles (standard, mild, step, fast)


GLP/GMP printouts-reports


Repeatable and customized applications


Work optimization due to the use of halogen lamps


Capacity and

temperature


MA.X2.A maximum capacity ranges from 50g/0.1mg to 210g/0.1mg. Moisture content is measured with the 0.01% accuracy (0.001 % for samples bigger than 1.5g). The maximum drying temperature is 160˚C (there is an optional

moisture analyzer with 250˚C maximum temperature).


An additional element for moisture analyzers that improves their functionality is a water vapour permeability determination set used in tanning industry for determining hygienic properties of leather.


Databases:


Information system of X2 series moisture analyzers is based on 8 databases, allowing many users to operate product database comprising many samples. Collected measurements may be subjected to subsequent analysis.


Collected data is registered in 8 databases:


Products (up to 5000 products)


Users (up to 100 users)


Packaging (up to 100 packagings)


Customers (up to 1000 customers)


Drying programs (up to 200 drying programs)


Drying process reports (up to 5000 drying process reports)


Ambient conditions (up to 10000 records)


Weighings (up to 50000 records)


The results


The results obtained using the moisture analyzer (the final result of the drying process):


% M – the mass loss in %; displays the mass change recorded during the drying process, expressed as a percentage,


% D – the dry mass obtained during the drying process, expressed as a percentage; the result is the portion of the sample that remains on the weighing pan after the moisture has evaporated,


% R – the ratio of moisture content to dry mass, obtained during the drying process, expressed as a percentage; the result is the portion of the sample that evaporated during the drying process,


g – the sample mass after drying.


Interfaces


USB interface ensures quick transfer and copying of any results of your work (measurements, reports, databases) to a computer or other moisture analyzer.


Remote access to the moisture analyzer allows for online data management.


Cooperation with E2R allows for external data management which in turn increases the efficiency and results to the maximum.

Product details
FunctionsAutotest, Statistics, IR sensors, GLP Procedures, Replaceable unit, Statistical Quality Control, ALIBI Memory, Drying modes, Samples drying, Moisture content analysis, Dry mass determination, Wi-Fi
About QuestPair

QuestPair matches professionals in research and industry with manufacturers, suppliers and resellers of scientific products. Companies and organisations can easily sign up for an account and showcase their laboratory equipment and other products on the marketplace. It is possible to list both new as well as used equipment. QuestPair features a variety of equipment for the physical, chemical and life sciences such as spectrometers, balances, centrifuges, testing devices, medical devices, incubators, microfluidics kit, heaters, coolers and other specialist instruments.

Related items:
Radwag F2 Mass Standard - Stainless Steel Wire - 500 mg-cover
Radwag F2 Mass Standard - Stainless Steel Wire - 500 mg

F2-class mass standards represent an impressive level of precision in mass measurement. Classified a (more)s metrology grade F2, they are recognized as top-quality tools suited for advanced applications where precision is a key element. F2 mass standard: stainless steel wire Nominal value: 500 mg Material: stainless steel Exceptional Measurement Precision F2 class mass standards feature excellent measurement precision achieved through stringent standards for allowable deviation from actual weight. Stability under Dynamic Conditions An important feature of F2-class mass standards is their ability to maintain measurement stability even under dynamic measurement conditions. They are designed to cope with a variety of factors that affect measurement precision. Calibration at the Highest Level The calibration process of F2-class mass standards adheres to the most stringent norms and standards. This makes the standards of this class recognized as tools with the highest degree of accuracy, complying with international requirements. Use of Materials with Outstanding Properties F2 class mass standards are often constructed from materials with outstanding physical properties. This ensures not only excellent precision, but also exceptional durability. Application 1. Scientific Research at the Highest Level In scientific research, especially in fields that require the utmost precision, such as nuclear physics or astrophysics, F2 class mass standards are indispensable. 2. Metrology Industry In metrology laboratories engaged in testing and maintaining the most advanced measurement standards, F2 class standards are indispensable working tools. 3. High-Precision Testing Laboratories In laboratories specializing in research requiring the highest precision, such as forensic laboratories and materials testing, F2 class mass standards are essential. 4. Aerospace Industry In the precision mass measurements required in the aerospace industry, F2 class standards provide reliability and excellence. F2 class mass standards are the symbol of the highest precision in the field of mass measurement. Their use is crucial in the most advanced fields of science, industry and research.

€34.00 ex VAT
Poland
mass standards
Radwag F1 Mass Standard - Stainless Steel Wire -500 mg-cover
Radwag F1 Mass Standard - Stainless Steel Wire -500 mg

F1 class mass standards are exceptional measuring tools that represent the pinnacle of precision in  (more)the field of metrology. Classified as F1 metrology class, they are perfect for advanced applications where every detail of measurement is of paramount importance. F1 class standard: stainless steel wire Nominal value: 500 mg Material: stainless steel Highest Precision and Accuracy F1 class mass standards are characterized by absolute measurement precision and extraordinary accuracy. They are designed to meet the most stringent standards for acceptable deviation from actual weight. Stability under Difficult Conditions An important feature of F1 class mass standards is their ability to maintain measurement stability even under harsh environmental conditions. The standards of this class are resistant to changes in temperature, humidity and other factors that affect the precision of measurements. Calibration in Accordance with International Standards The calibration process for F1-class mass standards is rigorous and in accordance with international standards. This ensures that standards of this class are globally recognized and can be used in different countries. Specialized Construction Materials F1-class standards are often made of materials with unique physical properties. This provides them not only with precision, but also with durability and wear resistance. Applications 1. Industrial Metrology F1 class mass standards are used in metrology laboratories engaged in the testing and maintenance of measurement standards. 2. Scientific Research In scientific research, especially in high-precision fields such as physics and astronomy, F1-class mass standards are a key tool. 3. Aerospace Industry In the precision mass measurements required by the aerospace industry, F1-class standards guarantee reliability and accuracy. 4. Calibration Laboratories In calibration laboratories where uniformity and precision are a priority, F1-class mass standards are the standard of excellence. F1-class mass standards are synonymous with the highest quality and precision in the field of metrology. Their use is crucial where even the slightest deviation from the standard can carry unpleasant consequences. They are tools for advanced applications that contribute to raising standards in the field of mass measurement.

€38.00 ex VAT
Poland
mass standards
People are watching right now:
LAUDA Proline PB heating thermostat-cover
LAUDA Proline PB heating thermostat

LAUDA Proline immersion thermostat The LAUDA Proline bridge thermostats with vario flex pump are exc (more)ellent for thermostating in any tank. The PB models have a pressure / suction pump and are used in tanks of 200 mm. While the PBDs are equipped with pumps with more powerful pressure and used in tanks of 320 mm deep. Also available are a telescopic rod for tubs with a width of 310 to 550 mm, an ergonomic handle and attachments for side pumps. The LAUDA Proline bridge thermostats are available with two different control panels. The Master version (PB, PBD) is designed for all applications where the parameters are not changed very often. Models with the removable Command operating unit (PB C; PBD C) offer a graphic LCD screen for high ease of use and optimum functionality. The 'D' versions, 'PBD' and 'PBD C' models, are equipped with a max 1.1 bar pressure pump only, with a max. (pressure) of 32 L/min. The 'PB' and 'PB C' models are equipped with pressure and suction pumps, mac 0.7 bar and 0.4 bar respectively, with a max. (pressure) of 25 L/min. Notable features - PowerAdapt system for optimal adaptation of the max. Heat output. without interfering with the mains power supply - Low level protection and adjustable overtemperature protection with audible alarm. Levels measured with float Accessories included Fittings for pump connection, telescopic rod Specific characteristics of the Proline PB model - For tanks of 200 mm deep - Master control panel; calibration point, timer, under / over temperature alarms, digital indicators - Tank volume max. 80 L - Water-cooled temperature range from 20°C to 300°C - Operating temperature range from -30°C to 300°C - Pump connectors M16 x 1 - Fitting 13 Ø

€4,488.00 ex VAT
€5,340.72 incl. VAT if applicable
Italy
thermostats
Radwag MA 200/1.X2.IC.A.WH Moisture Analyzer-cover
Radwag MA 200/1.X2.IC.A.WH Moisture Analyzer

MA X2.IC.A moisture analyzers are hi-tech measuring instruments intended for quick determination of  (more)relative moisture content, dry mass content and other parameters in samples of different substances. MA.X2.IC.A series is equipped with innovative system: the drying chamber can be opened and closed automatically using button or proximity sensors. Such solution allows: Maintaining moisture analyzer clean – operator does not touch moisture analyzer’s housing. Removing any shocks caused by manual closing of the chamber – the chamber closes automatically and always with the same intensity. Achieving high repeatability of opening and closing the drying chamber. Enhancing drying process automation. Enhancing safety of operation by eliminating contact with hot components of drying chamber. Improving operation ergonomics. MA.X2.IC.A series features user-friendly colour touchscreen. Free configuration of the control panel can be done by means of hotkeys, customizable information fields and programmable labels. Drying process can be carried out for any temperature and – thanks to databases – particular drying process may be set for a specific product. Highlights of X2 Series moisture analyzers: Automatic opening and closing of the drying chamber 5” capacitive colour touchpad Modern interface Uncomplicated, intuitive operation Programmable display Drying profiles (standard, mild, step, fast) GLP/GMP printouts-reports Repeatable and customized applications Work optimization due to the use of halogen lamps Capacity and temperature MA.X2.IC.A maximum capacity ranges from 50g/0.1mg to 210g/0.1mg. Moisture content is measured with the 0.01% accuracy (0.001 % for samples bigger than 1.5g). The maximum drying temperature is 160˚C (there is an optional moisture analyzer with 250˚C maximum temperature). An additional element for moisture analyzers that improves their functionality is a water vapour permeability determination set used in tanning industry for determining hygienic properties of leather. Databases: Information system of X2 series moisture analyzers is based on 8 databases, allowing many users to operate product database comprising many samples. Collected measurements may be subjected to subsequent analysis. Collected data is registered in 8 databases: Products (up to 5000 products) Users (up to 100 users) Packaging (up to 100 packagings) Customers (up to 1000 customers) Drying programs (up to 200 drying programs) Drying process reports (up to 5000 drying process reports) Ambient conditions (up to 10000 records) Weighings (up to 50000 records) The results The results obtained using the moisture analyzer (the final result of the drying process): % M – the mass loss in %; displays the mass change recorded during the drying process, expressed as a percentage, % D – the dry mass obtained during the drying process, expressed as a percentage; the result is the portion of the sample that remains on the weighing pan after the moisture has evaporated, % R – the ratio of moisture content to dry mass, obtained during the drying process, expressed as a percentage; the result is the portion of the sample that evaporated during the drying process, g – the sample mass after drying. Interfaces USB interface ensures quick transfer and copying of any results of your work (measurements, reports, databases) to a computer or other moisture analyzer. Remote access to the moisture analyzer allows for online data management. Cooperation with E2R allows for external data management which in turn increases the efficiency and results to the maximum.

€3,886.00 ex VAT
Poland
balances, moisture analysers
Radwag HX7.4N.600/1500.H3.LD Multifunctional Stainless Steel Ramp Scale-cover
Radwag HX7.4N.600/1500.H3.LD Multifunctional Stainless Steel Ramp Scale

The HX7.4N H scale is a device controlled by means of the PUE HX7 indicator, and it has been equippe (more)d with a 4-load-cell ramp platform made of stainless steel, AISI 304. This robust design facilitates weighing of heavy loads in humid environment. The ramps enable easy loading and unloading. Indicator with a colour 7” graphic display and a diode bar graph allow to observe visualisation of a current load mass presented in relation to the scale range or declared minimum and maximum thresholds. This makes the operation significantly easier. At the back of the housing there are hermetic connectors of RS232, RS485, USB and Ethernet communication interfaces, plus digital inputs/outputs and analogue output. This enables cooperation with external devices such as barcode scanners, printers, external displays, control buttons, light signalling towers, other controlling/signalling devices, systems for automatic process control and superior IT systems. With use of the bracket you can either place the indicator at any flat horizontal surface, or fix it to the wall adjusting the tilt respectively to suit your needs. The terminal's software allows carrying out processes such as weighing, parts counting, dosing, labelling, formulations and percent weighing. Indicator’s system of information is based on databases (users, products, weighings, packaging, formulations, customers) and ALIBI memory which guarantees stored data safety. Since the scale is equipped with a platform lifting system, you are kindly requested to order a transport box (OSB box for the platform) for it. The transport box is necessary for the safe and efficient transport and storage of the ramp scale with the platform lifting system. Please take this item into consideration when planning and placing your order. If you have any questions, the Customer Service Department will be happy to assist you.

€14,234.00 ex VAT
Poland
ramps, platform scales, ramp scales
Motic Panthera E2 Trinocular + BTI10 Camera Bundle-cover
Motic Panthera E2 Trinocular + BTI10 Camera Bundle

Motic Panthera E2 Trinocular + BTI10 Camera Bundle Panthera E2 microscopes combine high quality mate (more)rials and precise engineering to a persistent and resilient construction. Smooth operation of the mechanics is self-evident for fast and reliable results, responsible for shifting your daily work in classroom and lab to a higher level of quality. User-friendly design, robust for tough environments and unique features grants the best performance. The Moticam BTI10 combines a space-saving camera hardware with new Wi-Fi technology. The 4MP Wi-Fi camera comes together with an 10” Android tablet to deliver fast live images (up to 30 fps) on any microscope with a vertical photo tube.INCLUDED: The Motic Panthera E2 Trinocular + BTI10 Camera Bundle includes: - 4X/0.10 (WD 30.5mm ) Objective - 10X/0.25 (WD 17.4mm ) Objective - 40X/0.65/S (WD 0.6mm ) Objective - 100X/1.25/S-Oil (WD 0.16mm ) Objective - Dust Cover - Power Cord - Allen Key - UC-WF eyepieces 10X/20mm - Moticam BTI10 - 0.35X C-Mount camera adapter - Manufacturer’s Documentation - 5 Year Manufacturer’s Warranty Motic Panthera E2 Trinocular + BTI10 Camera Bundle SpecificationsPanthera E32 Trinocular SpecificationsOptical systemColor Corrected Infinity Optical System (CCIS®)Observation tubeTrinocular head, Siedentopf type, 360° swivelingInclination25° inclined, 360° rotating (storage saving), 360° swivellingTrinocular light splitFixed 50:50Interpupillary distance48-75mmDiopter adjustmentOn both eyepieces, +/- 5 diopterEyepiecesWidefield UC-WF10X/20mm with diopter adjustmentNosepieceReversed quadrupleObjective classificationCCIS® UC Plan Achromatic (Pb free)Objectives4X/0.10 (WD 30.5mm), 10X/0.25 (WD 17.4mm), 40X/0.65/S (WD 0.6mm), 100X/1.25/S-Oil (WD 0.16mm)Objective mounting threadW 4/5"x1/36" (RMS standard)Stand typeUprightStageMechanical stage with built-in low position rackless coaxial stage control and sample holderStage size140x135mmTravel range X&Y75x40mmCondenserFocusable and centerable Abbe condenser N.A. 0.90/1.25 with slot for contrast slidersDiaphragmIris diaphragmFocus mechanismCoaxial coarse and fine focusing system with tension adjustmentFine focus precision2μmFocusing stroke25mmUpper limit stopUpper limit stop preset but adjustableFilter holderOn top of the illuminatorTransmitted illuminationFixed Koehler LED 1W with intensity controlIllumination featuresNosepiece LED light intensity indicatorTransformerInternalPower supply110-240V (CE), USB 2.0 for battery packOther featuresUSB 2.0 for external camera powerDimensions LxWxH282x210x396mmNet weight7.5kg BTI10 Camera SpecificationsSensor TypeCMOSSensor Size1/3"Imaging Area5.44x3.07mmCapture Resolution Info4MP (2592x1520 pixels)Live display mode through Wi-Fi1280x720, 1920x1080 pixels (Full HD)Live display mode through Ethernet1280x720, 1920x1080 pixels (Full HD)Pixel size2.0x2.0μmScan modeProgressiveData transferWi-Fi (2.4 & 5 GHz), EthernetMax. frames per second (fps)1920x1080 @ 30 fps, 1280x960 @ 30 fps (depending on Wi-Fi strength)Exposure time0.03 msec to 0.03 secOperating temperatureFrom 0 to +60 Degrees Celsius non condensingMax. signal to noise ratio38.3dBDynamic range64.6dBSensitivity1.9V/Lux-sec (550nm)ButtonsOn/OffSupport deviceUniversal Web browser (HTML5)Supported OSWindows XP/Vista/7/8/10, MAC OSX, Android 4,0 or higher, iOS7 or higherMinimum computer requirements2GHz dualcore - RAM memory 2GB - Video memory min. 512 MBLens mountC-MountScreen10" IPS TabletSoftwareMotiConnect App for iOS and Android (pre-installed)FunctionsStill image and video capture, live and still image measurement, image adjustments, white balance, automatic & manual exposure, individual objective calibration system.Power supply12V (External Power supply)Tablet bracket holderFor tablets from 7” to 10”Package includesUSB cable, Motic 4-dot calibration slide, universal power supply 100V-240V (CE)Tablet SpecificationsSize (mm)218x136x10mmSystemAndroid 10Pre-installed AppMotiConnectLanguageMulti-LanguageCPU2.0GHz 8-coreRAM6GB DDR3NAND Flash128GBDisplay10" (IPS) 16:10 RatioDisplay resolutions1920x1200Touch PanelCapacitive Multi-Touch ScreenGPUMALI-G720 MP3PortsMicroSD/MMC/TF Card (Support up 64 GB), 3.5mm Audio, USB-C (USB OTG and Charging)Speaker8Ω/0.7Wx2MicMIC (Internal)Wi-Fi802.11b/g/nBluetooth4.0CameraFront (5M Pixels) + Rear (8M Pixels)Support display formatMPEG-1/2 (DAT, MPG, VOB, TS), MPEG-4, H.263 (3GP, MOV, MP4), H.264 (AVI, MKV, MP4, MOV, 3GP), RM, RMVB, FLV, WEBMSupport audio formatMP3, WMA, MP2, OGG, AAC, M4A, OGA, FLAC, APE, MP1, WAVPicture formatJPG, JPEG, GIF, BMP, PNGBattery3.7V/3500mAh Rechargeable BatteryPower supply tabletInput:AC100-240V. 50-60HZ - Output: DC5V 2A (Support USB port charging)CertificationsFCC CEColorWhiteComparison of ModelsSpecificationPanthera E2 BinocularPanthera E2 Binocular (w/o 100x)Panthera E2 Trinocular + BMH4000 Camera BundlePanthera E2 Trinocular + BTI10 Camera BundlePanthera E2 TrinocularPanthera E2 Trinocular (w/o 100x)Optical SystemColor Corrected Infinity Optical System (CCIS®)Color Corrected Infinity Optical System (CCIS®)Color Corrected Infinity Optical System (CCIS®)Color Corrected Infinity Optical System (CCIS®)Color Corrected Infinity Optical System (CCIS®)Color Corrected Infinity Optical System (CCIS®)Observation TubeBinocular head, Siedentopf type, 360° swivelingBinocular head, Siedentopf type, 360° swivelingTrinocular head, Siedentopf type, 360° swivelingTrinocular head, Siedentopf type, 360° swivelingTrinocular head, Siedentopf type, 360° swivelingTrinocular head, Siedentopf type, 360° swivelingTrinocular Light SplitN/AN/AFixed 50:50Fixed 50:50Fixed 50:50Fixed 50:50EyepiecesWidefield UC-WF10X/20mm with diopter adjustmentWidefield UC-WF10X/20mm with diopter adjustmentWidefield UC-WF10X/20mm with diopter adjustmentWidefield UC-WF10X/20mm with diopter adjustmentWidefield UC-WF10X/20mm with diopter adjustmentWidefield UC-WF10X/20mm with diopter adjustmentObjectives4X/0.10 (WD 30.5mm), 10X/0.25 (WD 17.4mm), 40X/0.65/S (WD 0.6mm), 100X/1.25/S-Oil (WD 0.16mm)4X/0.10 (WD 30.5mm), 10X/0.25 (WD 17.4mm), 40X/0.65/S (WD 0.6mm)4X/0.10 (WD 30.5mm), 10X/0.25 (WD 17.4mm), 40X/0.65/S (WD 0.6mm), 100X/1.25/S-Oil (WD 0.16mm)4X/0.10 (WD 30.5mm), 10X/0.25 (WD 17.4mm), 40X/0.65/S (WD 0.6mm), 100X/1.25/S-Oil (WD 0.16mm)4X/0.10 (WD 30.5mm), 10X/0.25 (WD 17.4mm), 40X/0.65/S (WD 0.6mm), 100X/1.25/S-Oil (WD 0.16mm)4X/0.10 (WD 30.5mm), 10X/0.25 (WD 17.4mm), 40X/0.65/S (WD 0.6mm), 100X/1.25/S-Oil (WD 0.16mm)Stage Size140x135mm140x135mm140x135mm140x135mm140x135mm140x135mmIlluminationLEDLEDLEDLEDLEDLED.comparison-table tr td:nth-child(5) { background-color: #fffacd; }

$2,626.00 ex VAT
United States
cameras
Disclaimer: QuestPair assumes no responsibility or liability for any errors or omissions in the content of this site. The information contained in this site is provided and presented on an “as is“ basis with no guarantees of completeness, accuracy, usefulness or timeliness.

Customer Service

Here to help you with: Product Inquiries, Shipping & Support, Technical Support, Business Inquiries and Press.

We are available to assist you Mon-Fri, 10am - 5pm CET.
+31 (0) 73 7114717
[email protected]