Easily list your scientific equipment

Top suppliers for laboratory & industry

New and used instruments

Marketplace
Analytics
Brand
Mettler Toledo
Model
Mettler Toledo
Supplier
LabMakelaar Benelux B.V.
Location
Zevenhuizen - Netherlands
Price
€1,125.00 
(ex. VAT)
This item is
for sale
State of item
used
Categories

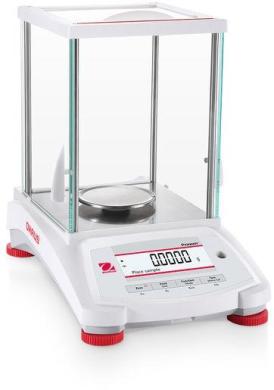
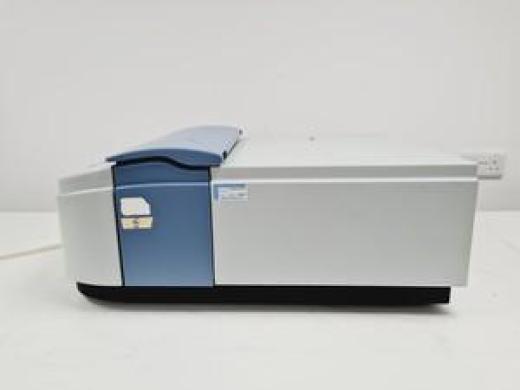
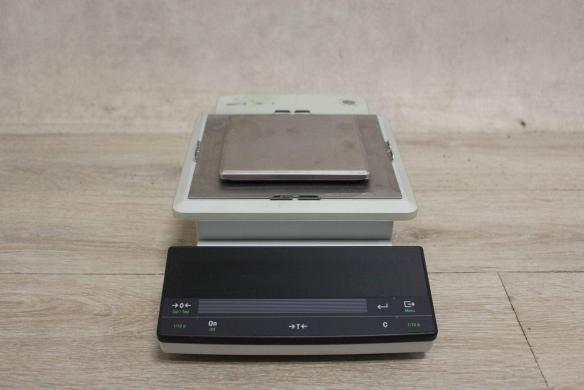
Mettler Toledo PR503 DeltaRange Precision Balance

LabMakelaar Benelux B.V.€1,125.00 (ex VAT)
item image

Description by the supplier

About QuestPair

QuestPair is a platform to find and acquire laboratory equipment by connecting research organisations, universities, and companies with high-quality, affordable instruments. The platform facilitates multiple sales daily worldwide and works with partners around the globe to provide trusted, vetted products for a wide variety of scientific needs. Our in-house developed AI algorithms collect data on the usage and availability of scientific instruments, enabling us to provide tailor-made assistance in sourcing suitable laboratory equipment. With a focus on cost-effectiveness and sustainability, QuestPair has an excellent track record in streamlining acquisitions for laboratories to further scientific research and development.

Related items:
A&D Weighing Apollo GX-124AEN Analytical Balance, 120 g, 0.1 mg (NTEP Class I)-cover
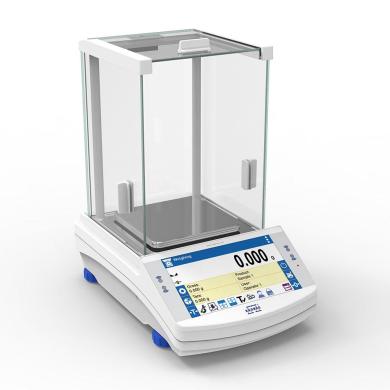
A&D Weighing Apollo GX-124AEN Analytical Balance, 120 g, 0.1 mg (NTEP Class I)

A&D Weighing Apollo GX-124AEN Analytical Balance, 120 g, 0.1 mg (NTEP Class I) Capacity 120 g R (more)eadability 0.0001 g Repeatability 0.0001 g Features - NTEP certified for compliance with legal-for-trade applications, ensuring reliable and accurate measurements in regulated environments - Increased productivity via faster stabilization times including 1 second fast mode with Smart SHS - Easily determine the minimum sample size to reduce waste and increase savings, plus alert users to ensure USP41 compliance - Simplify your daily precision check and SOPs with the standard deviation function - Set up repeatability testing and run automatic precision checks without external weights using Electronically Controlled Load (ECL) management - Reduce errors and damage with impact shock detection and overload protection - Eliminate static disturbance of samples with available fanless / touchless ionizer - The GX-AE series includes a touchless IR switch that activates the ionizer for a specified duration - Six simple and straightforward keys - A quick toggle to change between USB and RS-232C communication - Easily level the balance (even with gloves on!) the illuminated, front mounted level - Features a connector for integrating an external infrared sensor, facilitating touch-free operations and improving lab safety - Automatic self-calibration and one-touch internal/external calibration ensure valid results - FR-Cal – calculates, displays/outputs the mass or volume flow rate by entering density - FR-Compare – comparator that provides feedback if the flow rate is within limits The A&D Weighing Apollo GX-124AEN Analytical Balance, 120 g, 0.1 mg (NTEP Class I), provides high-precision measurements with a 120 g capacity and 0.0001 g readability. This NTEP-certified balance ensures accurate, reliable results for regulated environments. It includes a fanless ionizer, standard in AEN models, which neutralizes static charges without contact, ensuring stable, disturbance-free weighing. An external IR sensor enables touch-free operation, preserving cleanliness and enhancing accuracy by allowing users to interact with the balance without direct contact. The Electronically Controlled Load (ECL) management system supports repeatability testing and automatic precision checks without external weights, further reinforcing measurement reliability. The GX-124AEN features a fast stabilization time of approximately 1.5 seconds, making it ideal for high-throughput settings where speed and accuracy are critical. Streamlining daily operations and ensuring USP41 compliance, this advanced tool alerts users when sample sizes fall below minimum weight, reducing waste and boosting efficiency. Impact shock detection and overload protection provide added durability, while six simple keys and a quick toggle function facilitate smooth switching between USB and RS-232C communication options for flexible data management. Enhanced usability features include an illuminated, front-mounted level for easy leveling, even with gloves on, along with automatic self-calibration and one-touch internal/external calibration to ensure valid results. An extensive range of measurement units, along with percent calculation and piece counting capabilities, add versatility for diverse scientific applications. With a robust design, NTEP certification, and advanced features like the IR sensor, the A&D Weighing Apollo GX-124AEN Analytical Balance is an outstanding choice for professionals seeking precise, regulated analytical capabilities. Backed by a five-year warranty, it promises both reliability and peace of mind for long-term use. INCLUDED: The A&D Weighing Apollo GX-124AEN Analytical Balance, 120 g, 0.1 mg (NTEP Class I) includes: - Touchless IR Switch - External Key Jack - Large Glass Breeze Break with Built-in Fanless Ionizer - Breeze Break Ring - Weighing Pan - Bubble Spirit Level - USB Cable - Power Cord - Operator's Manual - Manufacturer's Documentation - 5 Year Manufacturer's Warranty

$3,712.00 ex VAT
United States
balances, scales
Radwag F2 Mass Standard - Stainless Steel Wire - 2 mg-cover
Radwag F2 Mass Standard - Stainless Steel Wire - 2 mg

F2-class mass standards represent an impressive level of precision in mass measurement. Classified a (more)s metrology grade F2, they are recognized as top-quality tools suited for advanced applications where precision is a key element. F2 mass standard: stainless steel wire Nominal value: 2 mg Material: stainless steel Exceptional Measurement Precision F2 class mass standards feature excellent measurement precision achieved through stringent standards for allowable deviation from actual weight. Stability under Dynamic Conditions An important feature of F2-class mass standards is their ability to maintain measurement stability even under dynamic measurement conditions. They are designed to cope with a variety of factors that affect measurement precision. Calibration at the Highest Level The calibration process of F2-class mass standards adheres to the most stringent norms and standards. This makes the standards of this class recognized as tools with the highest degree of accuracy, complying with international requirements. Use of Materials with Outstanding Properties F2 class mass standards are often constructed from materials with outstanding physical properties. This ensures not only excellent precision, but also exceptional durability. Application 1. Scientific Research at the Highest Level In scientific research, especially in fields that require the utmost precision, such as nuclear physics or astrophysics, F2 class mass standards are indispensable. 2. Metrology Industry In metrology laboratories engaged in testing and maintaining the most advanced measurement standards, F2 class standards are indispensable working tools. 3. High-Precision Testing Laboratories In laboratories specializing in research requiring the highest precision, such as forensic laboratories and materials testing, F2 class mass standards are essential. 4. Aerospace Industry In the precision mass measurements required in the aerospace industry, F2 class standards provide reliability and excellence. F2 class mass standards are the symbol of the highest precision in the field of mass measurement. Their use is crucial in the most advanced fields of science, industry and research.

€34.00 ex VAT
Poland
mass standards
Radwag Stainless Steel Wire, Set (1 mg - 500 mg), Wooden Box-cover
Radwag Stainless Steel Wire, Set (1 mg - 500 mg), Wooden Box

Stainless Steel Wire - set (1 mg - 500 mg) F2-class mass standards represent an impressive level of  (more)precision in mass measurement. Classified as metrology grade F2, they are recognized as top-quality tools suited for advanced applications where precision is a key element. F2 Class Mass Standards – Key Features Exceptional Measurement Precision - F2 class mass standards feature excellent measurement precision achieved through stringent standards for allowable deviation from actual weight. Stability under Dynamic Conditions - An important feature of F2-class mass standards is their ability to maintain measurement stability even under dynamic measurement conditions. They are designed to cope with a variety of factors that affect measurement precision. Calibration at the Highest Level - The calibration process of F2-class mass standards adheres to the most stringent norms and standards. This makes the standards of this class recognized as tools with the highest degree of accuracy, complying with international requirements. Use of Materials with Outstanding Properties - F2 class mass standards are often constructed from materials with outstanding physical properties. This ensures not only excellent precision, but also exceptional durability. The set includes: wooden box 12 mass standards 1 pair of tweezers 1 brush Material: stainless steel Application 1. Scientific Research at the Highest Level In scientific research, especially in fields that require the utmost precision, such as nuclear physics or astrophysics, F2 class mass standards are indispensable. 2. Metrology Industry In metrology laboratories engaged in testing and maintaining the most advanced measurement standards, F2 class standards are indispensable working tools. 3. High-Precision Testing Laboratories In laboratories specializing in research requiring the highest precision, such as forensic laboratories and materials testing, F2 class mass standards are essential. 4. Aerospace Industry In the precision mass measurements required in the aerospace industry, F2 class standards provide reliability and excellence. F2 class mass standards are the symbol of the highest precision in the field of mass measurement. Their use is crucial in the most advanced fields of science, industry and research.

€255.00 ex VAT
Poland
mass standards
Radwag PA-04/H Automatic Feeder-cover
Radwag PA-04/H Automatic Feeder

The automatic feeder is dedicated for automatic dispensing of small objects onto the weighing pan of (more) RADWAG-manufactured balance to which it is connected. The feeder ensures regular feeding of the elements in accordance with determined time intervals. Operation and Compatibility The PA-04/H feeder cooperates with XA 4Y and AS 3Y analytical balances and PS 3Y precision balances. Both the feeder and the balance are automated devices. The balance carries out analysis of dosed elements and sends signal to the feeder to dispense subsequent element. The feeder features diodes, signalling its operation, and keypad allowing to control the process. Automatic feeder is equipped with function of automatic emptying of the storage bin. Vibrating Feeder Cylindrical vibrating feeder with storage bin enables safe and precise dosing of elements. The storage bin has a conical and stepped shape and is continuously welded. The stainless steel surface of adequate roughness reduces elements grating during dosing process. Variety of Applications The feeder is appropriate for dosing pills of diameter ranging from 3 to 25 mm, round and oblong, as well as details of similar shapes and dimensions Design The device is equipped with powder-coated steel housing and stainless steel cover. The storage bin features transparent lid that allows verifying quantity of remaining elements. Compatible with scales: All analytycal XA 5Y.A All analytycal XA 5Y Microbalances: - XA 21.5Y.M.A - XA 21/52.5Y.M.A - XA 52.5Y.M.A - XA 53.5Y.M.A Microbalances: - XA 21.5Y.M - XA 21/52.5Y.M - XA 52.5Y.M - XA 53.5Y.M Note! To make the feeder work, simply buy the PT0453 cable, which is not part of the set.

€6,464.00 ex VAT
Poland
microbalances accessories, scales, ultra & microbalances accessories, balances, analytical balances, analytical balances accessories, balances accessories, general laboratory equipment other, microbalances
Radwag XA11 - XA Adapter for Pipette Calibration 11 ml-cover
Radwag XA11 - XA Adapter for Pipette Calibration 11 ml

XA11 pipette calibration adapter enables calibration and/or verification of piston pipettes by means (more) of a gravimetric method using the XA microbalance. Set content: base weighing pan weighing vessel evaporation ring glass chamber with an opening for dosing Evaporation ring is an integral part of the adapter that increases relative humidity inside the weighing chamber. With this evaporation of the liquid during calibration/verification is stopped. An integrated weighing pan enables centric loading of the vessel in the weighing chamber. The weighing pan and the vessel are housed in a glass chamber featuring an opening allowing the user to dispense liquid through it, and reducing air drafts. Vessel capacity: 11 ml Adapters for Pipettes Calibration Pipette calibration adapters are intended for calibration and verification of piston pipettes using gravimetric method. Use of the pipette calibration adapter reduces maximum capacity of the balance by the mass of the weighing vessel. The table below, which presents the minimum requirements in accordance with ISO 8655-6:2022 standard, enables to select suitable adapter for pipette calibration and respective balance version. The parameters of the balance have been selected so that the expanded uncertainty of measurement in use is less than ¼ of the maximum permissible error of the test object. Nominal volume of apparatus under test V Resolution (d) mg Repeatability (s)3mg Recommended balance Microbalances Analytical balances 0,5 µl ≤ V < 20 µl 0,001c 0,01d 0,006c, e 0,03d MYA 21.5Y XA 6/21.5Y.M.A XA 6/21.5Y.M XA 21.5Y.M.A XA 21.5Y.M XA 21/52.5Y.M.A XA 21/52.5Y.M XA 53.5Y.M.A XA 53.5Y.M 20 µl ≤ V < 200 µl 0,01 0,025 XA 52.5Y XA 110.5Y XA 82/220.5Y.A XA 82/220.5Y XA 120/250.5Y.A XA 120/250.5Y 200 µl ≤ V ≤ 10 ml 0,1 0,2 Adapter for pipette calibration MY 11 XA 11 XA 11 XA 11 XA 11 XA 17 XA 17 XA 17 XA 100 XA 17 XA 100 Maximum vessel capacity 11 ml 11 ml 11 ml 11 ml 11 ml 17 ml 17 ml 17 ml 100 ml 17 ml 100 ml Weighing vessel mass ~ 10 g ~ 10 g ~ 10 g ~ 10 g ~ 10 g ~ 11 g ~ 11 g ~ 11 g ~ 65 g ~ 11 g ~ 65 g a The repeatability values, in this table, apply in the volumen determination of a single channel pipette. When a single-channel balance is used for volumen determination of single channel pipettes the repeatability values are double the values of this table. c Single-channel balance. d Multichannel balance, only valid for multi-channel pipettes. Multi-channel balances of 0,01 mg readability may be uses to test multi-channel pipettes with nominla volumes below 20 µl only if the expanded uncertainty in use is less than ¼ of the maximum permissible systematic error of the test object. e For single-channel pipettes of nominal volumes of less than 2 µl, a balance with repeatability better than the values in the table shall be used so that the expanded uncertainty in use is less than ¼ of the maximum permissible systematic error of the test object. table {font-size: 12px} td {padding:10px; } tr {text-align:center;} @media (max-width: 800px) { table {font-size: 9px} td {padding: 1px 1px} }

€1,108.00 ex VAT
Poland
balances, analytical balances, analytical balances accessories, balances accessories, microbalances, microbalances accessories, pipettes, pipettes calibration, scales, ultra & microbalances accessories, ultra microbalances
Radwag MA 50/1.5Y.IC.WH Moisture Analyzer-cover
Radwag MA 50/1.5Y.IC.WH Moisture Analyzer

Do you need a moisture analyzer that not only determines moisture or dry matter content with impress (more)ive accuracy, but also performs a digital audit, responds to your voice commands and sends you light messages? If so, learn about the functionality of the ELLIPSIS series of moisture analyzers: It Dries in 4 Ways The MA 5Y.IC Moisture Analyzer offers you four drying profiles: standard, mild, fast and step. The standard profile is the usually used drying profile. It allows the most accurate determination of moisture content. The mild profile is designed for drying substances that are sensitive to the rapid heat released by the filaments, which heat full power at the initial stage of the process. An example of such a substance is leather. You will use the fast profile for samples with significant moisture content – of the order of even several tens of percent. The step profile will be ideal for drying substances that contain more than 15 percent moisture. Within this profile you can define any three temperatures. You will choose the values of temperature and duration of heating experimentally. What Drying Temperature Should I Set? The drying temperature determines the duration of the process. Its value depends on the type of material. If the temperature is too low, it will under-dry the sample and, consequently, unnecessarily increase the measurement time, while if it is too high, it will cause a burning effect on the material. The drying temperature for the traditional (oven) method is determined by industry or factory standards. If there are no standards, you will select the temperature experimentally. The maximum drying temperature on the MA 5Y.IC Moisture Analyzer is 160°C. How Do I Finish the Drying? In 4 Ways The MA 5Y.IC Moisture Analyzer has four finish modes: automatic, manual, time-defined and user-defined. Automatic mode You define the moisture loss limit value in 60 seconds. When the moisture analyzer reaches the set criterion, the measurement will automatically end. Manual mode You terminate the measurement yourself by pressing the STOP button. Time-defined mode The measurement ends after the set time has elapsed regardless of the result. You have up to 99 hours 59 minutes to manage! User-defined mode When you remove all volatiles from a sample, by definition, its mass should be constant. During drying, the dry mass of the sample is defined by a condition: if the mass of the sample is stable within 1 mg during the observation time (Auto 1-5), we consider that all volatile components have been removed from its structure. Digital Weighing Auditor Ensures that your moisture analyzer is ready for use. What is more, it informs about the need for a moisture analyzer inspection or a periodic audit of the moisture analyzer’s accuracy and sensitivity. 10-Inch Display Bigger screen – 10’’ – means more information in one place. On the new ELLIPSIS terminal, you will see up to 3 screens, widgets, graphs, statuses, notes, handy measurement history. Uncompromising User Verification For the first time ever, the moisture analyzer will verify the user using a password, RFID card, fingerprint reader, facial recognition mechanism, or any combination of these. Ambient Light – an Innovative Way for the Moisture Analyzer to Communicate With the User The light colour will tell you about status, process results, procedures, or alerts. Hotspot Use the moisture analyzer on any device connected to it. This can be a smartphone, tablet, or computer. RFID ELLIPSIS works with RFID tags* that can be used to tag your products or formulation ingredients in the database. They can also be used to identify a user. Live Note – Note Down Your Conclusions It’s the first time you can add a voice memo to a measurement series or procedure report. If you prefer to write it down, ELLIPSIS allows you to add a text note. Handy Library This is where a series of recent measurements or a report ready for digital signature, according to 21 CFR Part 11, can be found. Widgets Prepared to display what you need most at any given moment. 21 CFR Part 11 Do you work in the pharmaceutical industry? Do you need a digital signature? We are offering the moisture analyzer which as a standalone fully meets the requirements of 21 CFR Part 11/ EU GMP Annex 11. Full data security Electronic signatures Validations Electronic records Audit trails Modbus TCP/IP is one of the most popular communication protocols in industrial automation. Implementing it in the 5Y balances and CY10 scales makes the devices of this series friendly to automation integrators. A balance or scale in a Modbus system is a slave device and performs tasks specified by the master device which is most often a PLC. Protocol Modbus TCP/IP in the 5Y balances and C10 scales enables, among other things, the realization of mass readout, zeroing and tare functions of the device, as well as tare settings and MIN and MAX thresholds. * RFID ISO/IEC 14443 Type A, 13.56 MHz

€4,054.00 ex VAT
Poland
balances, moisture analysers
People are watching right now:
Rohde & Schwarz Vector Signal Generator SMIQ03 300kHz-3.3GHz Opt. B1,B10,B11,B12-cover
Rohde & Schwarz Vector Signal Generator SMIQ03 300kHz-3.3GHz Opt. B1,B10,B11,B12

Manufacturer: Rohde & Schwarz, München Model: SMIQ 03 - Opt. B1, B10, B11, B12 WE HAVE ALSO ANOTHER  (more)MODEL WITH THE FOLLOWING OPTIONS AVAILABLE: SMIQ 03 - Opt.  B1, B10, B11 P/N: 1084.8004.03 VERY RARE OPTION B10 MODULATIONS CODER IS ALSO INSTALLED ! Description: The SMIQ03 is a vector signal generator with a frequency range of 300 kHz to 3.3  GHz. The high-grade I/Q modulator fitted as standard ensures minimum error vector magnitude and high intermodulation  suppression. Using modern digital signal processor (DSP) technology, the versatile concept allows the generation of high-precision digital modulation  signals at high bit rates without any limitations on modulation modes or standards. In addition to digital modulation, the SMIQ03 provides the full  range of analog modulation modes as well as simultaneous modulation capability. · Option SM-B1 – Reference Oscillator OCXO· Option SMIQB10 – Modulations Coder· Option SMIQB11 – Data Generator· Option SMIQB12 – Memory Extension to Data Generator Key Features: · Frequency range from 300 kHz to 3.3 GHz· High (up to 16 dBm) and precise output level (<0.5 dB)· Fast setting time for frequency (<3 ms) and level (<2.5 ms) (Without switching  the mechanical attenuators)· Frequency hopping (500 µs)· High spectral purity (typ. -130 dBc (1 Hz) at 1 GHz and 20 kHz carrier offset) Items delivered: - Rohde & Schwarz SMIQ03- Power Cord- Manual as PDF via E-Mail The vector signal generator is in very good condition. We tested the instrument  extensively and it's 100% functional tested.

€3,000.00 ex VAT
€3,570.00 incl. VAT if applicable
Germany
rf or microwaves testing equipment, signal generators
Memmert HPP750eco Climate Chamber 749L, 115V-cover
Memmert HPP750eco Climate Chamber 749L, 115V

Memmert HPP750eco Climate Chamber 749L, 115V Setting Temperature Range (without light, with humidity (more)) +5 to +70°C Setting Range Humidity 10 to 90 % rh Chamber Volume 749 L (26.5 cu. ft.) Features - Large 749 L (26.5 cu. ft.) chamber capacity ideal for extensive sample storage - Temperature range with humidity from +5 to +70°C, ensuring precise control for sensitive samples - Accurate to 0.1°C with dual Pt100 sensors for reliable temperature monitoring and control - Humidity range adjustable from 10% to 90% RH, utilizing an external distilled water tank - Efficient humidification via hot steam generator and Peltier-based dehumidification - TwinDISPLAY ControlCOCKPIT with dual high-definition TFT displays and multi-language support - Comprehensive safety with AutoSAFETY system and dual over/undertemperature alarms - Program and manage settings with AtmoCONTROL software via USB or Ethernet The Memmert HPP750eco Climate Chamber 749L, 115V, offers expansive capacity and precise environmental control for research and laboratory needs. With a temperature range from +5 to +70°C with humidity, and 0 to +70°C without, this climate chamber is equipped to maintain stable and consistent conditions. Humidity can be adjusted from 10% to 90% RH, using a hot steam generator for efficient humidification and Peltier technology for energy-saving dehumidification. The chamber's 0.1°C temperature accuracy and dual Pt100 sensors ensure reliability for even the most sensitive samples, providing the highest standards in environmental consistency. This climate chamber offers advanced functionality with Memmert’s TwinDISPLAY ControlCOCKPIT, featuring intuitive dual TFT displays and multi-language support. The system’s AutoSAFETY feature integrates automatic over- and undertemperature protection with alarms, making it ideal for applications requiring uninterrupted monitoring. With programmable settings and calibration via AtmoCONTROL software, the HPP750eco enables seamless data management through USB or Ethernet. Built with durable, scratch-resistant stainless steel and equipped with lockable castors for easy mobility, this unit is both robust and practical for demanding lab environments. INCLUDED: TheMemmert HPP750eco Climate Chamber 749L, 115V includes: - 2 Stainless Steel Grid - Tilt Protection Wall Bracket - USB Drive w/ Software &amp; AtmoCONTROL Manual - Calibration Certificate - Power Cord - Operator's Manual - Manufacturer's Documentation - 3 Year Manufacturer's Warranty

$23,180.00 ex VAT
United States
climate controlled cabinets & enclosures
Radwag High Resolution Platforms PL.150.HRP-cover
Radwag High Resolution Platforms PL.150.HRP

High Capacity HRP Platform Wherever high readability and precision are important. Wherever good repe (more)atability in harsh industrial conditions matters. High Capacity HRP Platforms are the ideal solution for any type of industry. Repeatability that cannot be repeated by others High Capacity HRP Platforms have a built-in internal adjustment system. Automatic internal adjustment guarantees the best quality of work and repeatability of results. You save time and avoid the inconvenience of manual adjustment. Unbreakable High Capacity HRP Platforms feature a modern electromagnetic mechanism design in a sealed steel housing and overload protection. The use of stainless steel for the pan guarantees you a long life of the platform. Fearless of its contact with moist objects or accidental splashing. High Capacity HRP Platforms are distinguished by a high degree of protection IP 67. For an additional charge we will make HRP platforms in Ex version, but in order for the device to work in explosive areas, you need to supply the PUE HX5.EX terminal. Use the potential High Capacity HRP Platforms work with one of two weighing terminals: PUE 7.1 or PUE HY10. The terminals&rsquo; software enables you to archive your work results, ensures data safety, and allows the platforms to work with powerbanks from our offer. In turn, you will select appropriate antivibration tables for the platforms, and thus increase the readability of your measurements.

€5,314.00 ex VAT
Poland
weighing platforms, industrial scales accessories
Radwag C32.10.PM Precision Balance-cover
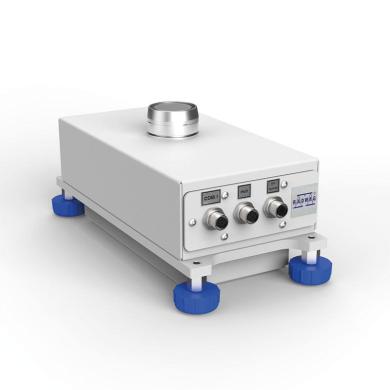
Radwag C32.10.PM Precision Balance

PM Balances by RADWAG Laboratory Precision Under Industrial Conditions. New technology The ability t (more)o weigh loads up to 120 kg on a large weighing pan with high accuracy and good repeatability, minimum eccentricity error over the entire range, quick and stable measurement (achievable within 1 second), parameter stability over time and during transport, weighing pan dimensions adapted to the accuracy of the balance are the distinguishing features of RADWAG PM balances. All of this is possible thanks to the use of a cutting-edge measuring system based on RADWAG&rsquo;s enhanced MonoBLOCK&reg; technology. The change in the design of the monoblock has made it possible to work with a readability of 0.01 g at a maximum capacity of 20 kg and 0.2 g at a maximum capacity of 120 kg, with a repeatability of 0.01 g, and resistance to changes in ambient conditions. PM balances also include: robust design based on a larger and taller Monoblock, built-in 4-point overload protection system, IP 43 ingress protection, internal adjustment, 5&quot; colour display, easy start-up, intuitive operation, and ergonomics. Application PM balances not only provide an accurate reading and quick measurement, but they are also versatile, allowing them to be used in a variety of industrial sectors. Dosing, formulation-making, and parts counting are just some of the possible applications of these multi-purpose devices. PM balances will find use wherever high-accuracy, high-load-capacity weighing equipment is required. Under-Pan Weighing Weighing instruments purchased after 15th February 2023 will allow under-pan weighing at any time after the purchase. All you need to do is just to order a dedicated hook. THBR 2.0 System Cooperation with THBR 2.0 System for ambient conditions monitoring. * RFID ISO/IEC 14443 Type A, 13,56 MHz

€2,680.00 ex VAT
Poland
precision balances, balances
Disclaimer: QuestPair assumes no responsibility or liability for any errors or omissions in the content of this site. The information contained in this site is provided and presented on an “as is“ basis with no guarantees of completeness, accuracy, usefulness or timeliness.

Customer Service

Here to help you with: Product Inquiries, Shipping & Support, Technical Support, Business Inquiries and Press.

We are available to assist you Mon-Fri, 10am - 5pm CET.
+31 (0) 73 7114717
[email protected]