Easily list your scientific equipment

Top suppliers for laboratory & industry

New and used instruments

Marketplace
Analytics
Supplier
Biomatyx
Location
Ennevelin - France
This item is
Not available
State of item
not_applicable
Categories

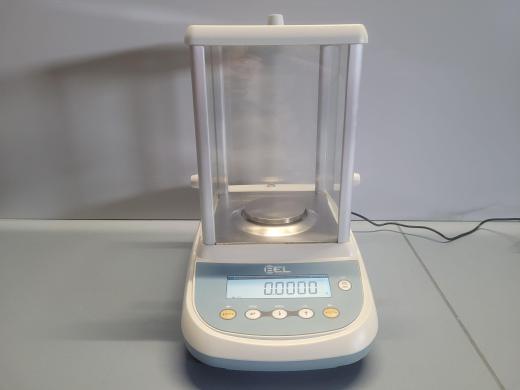
BEL M124A laboratory balance - 120g - 0.1mg

Biomatyx
item image

Description by the supplier

BEL M124A laboratory balance - 120g - 0.1mg

Technical parameters:

Precision balance reference M124A

Readability: 0.1 mg (10-4 g)

Maximum capacity: 120 g

Repeatability: 0.1 mg

Linearity: 0.3 mg

Tray dimensions: diameter 80 mm

Chamber dimensions (L x D x H): 162 x 171 x 225mm

Net weight approx. 6.3 kg

Scale dimensions (L x D x H): 215 x 345 x 345 mm

About Biomatyx

Biomatyx is a used laboratory equipment supplier with a varied and competent network. The company operates as a distributor internationally and buys and sell used machinery and equipment for analytical, chemical, pharmaceutical and medical laboratories.

About QuestPair

QuestPair is a platform to find and acquire laboratory equipment by connecting research organisations, universities, and companies with high-quality, affordable instruments. The platform facilitates multiple sales daily worldwide and works with partners around the globe to provide trusted, vetted products for a wide variety of scientific needs. Our in-house developed AI algorithms collect data on the usage and availability of scientific instruments, enabling us to provide tailor-made assistance in sourcing suitable laboratory equipment. With a focus on cost-effectiveness and sustainability, QuestPair has an excellent track record in streamlining acquisitions for laboratories to further scientific research and development.

Related items:
People are watching right now:
Radwag F2 Mass Standard - Stainless Steel Wire - 100 mg-cover
Radwag F2 Mass Standard - Stainless Steel Wire - 100 mg

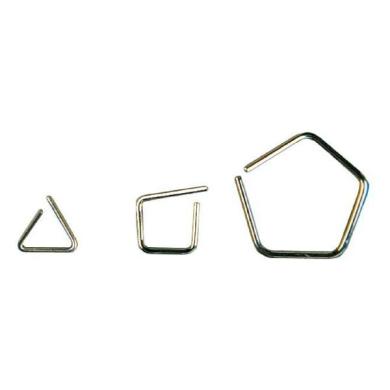
F2-class mass standards represent an impressive level of precision in mass measurement. Classified a (more)s metrology grade F2, they are recognized as top-quality tools suited for advanced applications where precision is a key element. F2 mass standard: stainless steel wire Nominal value: 100 mg Material: stainless steel Exceptional Measurement Precision F2 class mass standards feature excellent measurement precision achieved through stringent standards for allowable deviation from actual weight. Stability under Dynamic Conditions An important feature of F2-class mass standards is their ability to maintain measurement stability even under dynamic measurement conditions. They are designed to cope with a variety of factors that affect measurement precision. Calibration at the Highest Level The calibration process of F2-class mass standards adheres to the most stringent norms and standards. This makes the standards of this class recognized as tools with the highest degree of accuracy, complying with international requirements. Use of Materials with Outstanding Properties F2 class mass standards are often constructed from materials with outstanding physical properties. This ensures not only excellent precision, but also exceptional durability. Application 1. Scientific Research at the Highest Level In scientific research, especially in fields that require the utmost precision, such as nuclear physics or astrophysics, F2 class mass standards are indispensable. 2. Metrology Industry In metrology laboratories engaged in testing and maintaining the most advanced measurement standards, F2 class standards are indispensable working tools. 3. High-Precision Testing Laboratories In laboratories specializing in research requiring the highest precision, such as forensic laboratories and materials testing, F2 class mass standards are essential. 4. Aerospace Industry In the precision mass measurements required in the aerospace industry, F2 class standards provide reliability and excellence. F2 class mass standards are the symbol of the highest precision in the field of mass measurement. Their use is crucial in the most advanced fields of science, industry and research.

€34.00 ex VAT
Poland
mass standards
Radwag E1 Mass Standard - Stainless Steel Wire -2 mg-cover
Radwag E1 Mass Standard - Stainless Steel Wire -2 mg

E1-class mass standards are the elite in the world of metrology, because standards of this class rep (more)resent the highest level of precision and accuracy in mass measurement. The E1 classification is one of the most stringent standards that standards must meet in order to be considered the most advanced and trustworthy measurement tools. E1 - class standard: stainless steel wire Nominal value: 2 mg Material: stainless steel What Are the Characteristics of the E1 Class? Highest Precision - The allowable deviation from the actual weight is minimal, making standards of this class ideal for applications where every gram matters. Stability and Repeatability - This guarantees a consistent level of accuracy over the long term. Accurate Calibration - Standards of this class must be regularly compared with other standards of known mass to confirm their measurement accuracy. Materials with Unique Properties - E1 class mass standards are often made of materials with exceptional physical properties, which makes them stable and resistant to changes in environmental conditions. Application 1. Analytical Laboratories In analytical laboratories where accurate measurements are crucial, E1 class mass standards are used to calibrate balances with the highest precision. 2. Pharmaceutical Industry In drug manufacturing, where even the slightest deviation from the standard affects quality, E1 class mass standards are irreplaceable. 3. Scientific Research In scientific research, especially in areas requiring the highest precision, such as physics or chemistry, E1 class mass standards are used to ensure reliable results. 4. Metrology Industry In metrology laboratories where research on E1 class mass standards alone is carried out, E1 class standards are the standard of excellence. Class E1 mass standards are not only measuring tools, but also a symbol of metrological excellence. Their use affects the quality of measurements in various areas of life because they provide precision that can be relied upon. They are a key element in the world of mass measurement, shaping standards and raising the bar for all measurement tools.

€71.00 ex VAT
Poland
mass standards
IKA Pette multi 12 x 0.5 - 10 µl-cover
IKA Pette multi 12 x 0.5 - 10 µl

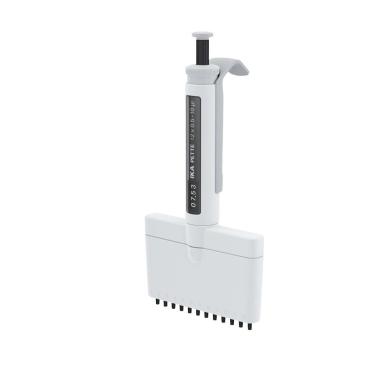
IKA Pette multi 12 x 0.5 - 10 µlLies comfortably in your hand with uncompromising precise performanc (more)e: IKA introduces the IKA PETTE multi, a series of mechanical air-displacement pipettes available with either 8 or 12 channels for precise dispensing in microtiter or deep well plates. In total, there are six different models available with different adjustable volume ranges from 0.5 to 200 μl. This brings IKA's pipette portfolio to a total of 24 models: ten single-channel pipettes with fixed volumes (PETTE fix), eight with variable volumes (PETTE vario), and six models of the PETTE multi. The IKA PETTE series are used for many different applications in the modern laboratory. Color-coding simplifies rapid selection of the right pipette. The impact-resistant, UV-resistant and chemically resistant conical tip ensures reliable metering in the long-term. Improved ergonomics as a result of replaceable handles IKA pipettes include three interchangeable handles in various different shapes and materials in the delivery. The choice of the right handle for your particular hand means that the pipette can be adapted to suit your individual requirements. This ergonomic optimization permits comfortable and wrist-friendly working, and ensures that the pipette sits in your hand perfectly in daily use for easy grasping of the working points. Precise and repeatable results are thus guaranteed. Comfortable and rapid adjustment of the pipetting volume The pipetting volume is adjusted in two stages (fine and coarse). Locking and unlocking of the volume is also carried out in the same way as fine adjustment by one hand using the multifunction button. The set volume can be read off the display in large figures at any time, process-safe and clearly Straightforward ejection of the tip of the pipette After the pipetting process, the tip of the pipette is ejected quickly and without time-consuming hand repositioning simply by pressing the central multifunction button. The round design means that the single-handed ejection works equally for both right-handed and left-handed users. Robust and smooth The piston and tip cone are made from DLC-coated stainless steel. DLC stands for diamond like carbon and is a diamond-like type of carbon which exhibits high levels of wear and corrosion resistance, together with particular hardness and low frictional indices. The DLC coating means that the tip cone is particularly insensitive and also ensures that the tips of the pipettes are always in perfect condition and are securely seated, without leaks. The extremely good anti-friction properties of the DLC also mean that the pipette will only need to be re-greased on rare occasions. The benefit of the coating for the user is primarily the consistent and low level of force required when absorbing and discharging the liquid to be pipetted. Maintenance-friendly, process-secure and easy to clean Regular cleaning and maintenance of the pipette guarantees a long service life for the product. The volume unit with piston and seal can be replaced completely in just a few hand movements. The equally simple assembly is acknowledged audibly by a click and is thus process-secure. Adjusting safely and without the need for tools If you detect deviations in the framework of calibration, the pipette will generally need to be adjusted. Tools are not needed for adjusting the IKA PETTE. The user thus saves valuable time in looking for the right tool. The pipette is subsequently secured against inadvertent adjustment. Simplified acquisition, documentation and monitoring Acquisition, documentation and monitoring of equipment and processes is of great importance in most laboratories. The serial number of the IKA PETTE can be scanned from a QR Code on the housing, easily and without transfer errors. The serial number and the pipette are thus uniquely linked. Can be autoclaved at 121°C The IKA PETTE is ideally suited to heat and high-pressure sterilization. Thanks to its simple construction, the pipette can be cleaned and autoclaved either in complete or in dismantled state. Large range of pipette tips All IKA PETTE models are compatible with pipette tips from most manufacturers. Pipette tips having the standard color codes gray, yellow, and blue always fit on our pipettes, marked accordingly. This means that there is a wide range of pipette tips to choose from and you can rest assured that only suitable tips are fitted.INCLUDED: The IKA Pette multi 12 x 0.5 - 10 µl includes: - Operator's Guide - Manufacturer's Documentation - 2 Year Manufacturer Warranty ( + Additional Free 1 Year Warranty Extension with IKA Registration) IKA Pette multi 12 x 0.5 - 10 µl SpecificationsParameterValueDesignAir displacement piston-operated pipetteHandlingMechanicalVolumeVariableNumber of channels12Colour CodeGrayNominal volume10 µlVolume min.0.5 µlVolume max.10 µlIncrements0.01 µlAccuracy with nominal volume±0.2 µlPrecision with nominal volume±0.1 µlAccuracy with 50% of nominal volume±0.2 µlPrecision with 50% of nominal volume±0.1 µlAccuracy with 10% of nominal volume±0.08 µlPrecision with 10% of nominal volume±0.05 µlCertificate of conformity according to ISO 8655yesAutoclavableyesPiston materialStainless steel DLC coatedDimensions (W x H x D)119 x 235 x 63 mmWeight0.160 kgPermissible ambient temperature5 - 40 °CPermissible relative humidity90 %Comparison of ModelsSpecification12 x 0.5 - 10 µl12 x 10 - 100 µl12 x 20 - 200 µl8 x 0.5 - 10 µl8 x 10 - 100 µl8 x 20 - 200 µlNumber of Channels121212888Nominal Volume10 µl100 µl200 µl10 µl100 µl200 µlVolume Range0.5 - 10 µl10 - 100 µl20 - 200 µl0.5 - 10 µl10 - 100 µl20 - 200 µlIncrements0.01 µl0.1 µl0.2 µl0.01 µl0.1 µl0.2 µlAccuracy (Nominal Volume)±0.2 µl±0.8 µl±1.6 µl±0.2 µl±0.8 µl±1.6 µlAutoclavableYesYesYesYesYesYesDimensions (W x H x D)119 x 235 x 63 mm119 x 235 x 63 mm119 x 235 x 63 mm83 x 235 x 63 mm83 x 235 x 63 mm83 x 235 x 63 mmWeight0.160 kg0.182 kg0.195 kg0.135 kg0.147 kg0.160 kg.comparison-table tr td:nth-child(2) { background-color: #fffacd; }

$435.00 ex VAT
United States
general laboratory equipment other
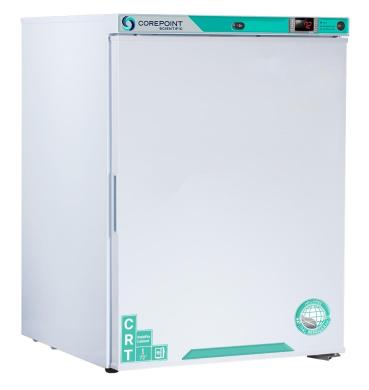
Corepoint Scientific CRTPR061WWW-0 20C to 25C Solid Door Freestanding Undercounter Controlled Room Temperature (CRT) Cabinet-cover
Corepoint Scientific CRTPR061WWW-0 20C to 25C Solid Door Freestanding Undercounter Controlled Room Temperature (CRT) Cabinet

Corepoint Scientific CRTPR061WWW-0 20C to 25C Solid Door Freestanding Undercounter Controlled Room T (more)emperature (CRT) Cabinet Temperature Setpoint Range 20°C to 25°C Capacity 5.2 cu. ft. (147.2L) Defrost Method Cycle Features - Microprocessor temperature controller with digital display for precise temperature management - Interior fan-driven, forced-draft air circulation system for excellent temperature uniformity and recovery - Audible and visual high/low temperature alarms with remote alarm contacts - Three adjustable shelves with guard rails and a bottom footed shelf for air circulation - Right-hinged solid swing door with keyed lock and magnetic gasket for security - LED interior light with switch activation and probe access port - Freestanding thermometer with 3-year calibration certificate and min/max memory - Environmentally friendly HFC-free refrigerant (R600a) and high-density urethane foam insulation The Corepoint Scientific CRTPR061WWW-0 20°C to 25°C Solid Door Freestanding Undercounter Controlled Room Temperature (CRT) Cabinet is designed for precise temperature control and reliable storage. This 5.2 cu. ft. capacity cabinet features a microprocessor temperature controller with a digital display, ensuring accurate temperature management within the adjustable range of 20°C to 25°C. An interior fan-driven, forced-draft air circulation system provides excellent temperature uniformity and recovery after door openings. The cabinet is equipped with audible and visual high/low temperature alarms, remote alarm contacts, and two probes (one in air and one in a sample bottle) for enhanced monitoring. Additional features include a right-hinged solid swing door, three adjustable shelves with guard rails, a bottom footed shelf for air circulation, and a back wall evaporator cover. Security is ensured with a keyed door lock and magnetic door gasket. The unit also includes a freestanding thermometer with a 3-year calibration certificate, min/max memory, switchable °F/°C, an LED interior light, switch-activated light, probe access port, leveling legs, and a powder-coated exterior. It uses environmentally friendly HFC-free refrigerant (R600a) and high-density urethane foam insulation. This cabinet is ideal for storing medications and other sensitive products, preventing unnecessary expenses and product recalls. INCLUDED: The Corepoint Scientific CRTPR061WWW-0 20C to 25C Solid Door Freestanding Undercounter Controlled Room Temperature (CRT) Cabinet includes: - Key for Door Lock - 3 x Adjustable Shelves - Power Cord - Operator's Manual - 2 Year Manufacturer's Warranty

$1,531.00 ex VAT
United States
electron microscopes, transmission electron microscopes
Disclaimer: QuestPair assumes no responsibility or liability for any errors or omissions in the content of this site. The information contained in this site is provided and presented on an “as is“ basis with no guarantees of completeness, accuracy, usefulness or timeliness.

Customer Service

Here to help you with: Product Inquiries, Shipping & Support, Technical Support, Business Inquiries and Press.

We are available to assist you Mon-Fri, 10am - 5pm CET.
+31 (0) 73 7114717
[email protected]